

 • PhotoTraces")
In case you are right here to be taught learn how to create preset in Lightroom, you’ve come to the fitting place. As a result of in at this time’s article, I’ll present you how one can create your individual presets utilizing my confirmed preset improvement technique.
In case you are simply in search of data on making a preset, under are step-by-step directions.
Right here’s learn how to create preset in Lightroom:
- Go into the Develop Module in Lightroom Basic
- Find the Presets panel on the left-hand-side and click on the Plus (+) icon within the prime proper nook
- Choose the Create Preset possibility from the drop-down menu
- Test the modifying changes you wish to save because the preset
- Title the Preset and specify the Group it belongs to
- Press the Create button
For in-depth particulars on creating panorama particular preset, test the tutorial under.
In at this time’s article, I wish to transcend the usual directions the place you inform folks to edit the picture in Lightroom any method they need and save all of the modifying steps as a preset.
This tutorial provides you with very actionable directions on learn how to create a common preset that may work with 90% of panorama photos. The preset you’ll preserve reusing for years to return.
Panorama photographs we take will range relying on lighting circumstances, the kind of landscapes, and your taking pictures model. And when you go too deep into the Lightroom modifying course of and attempt to save your edits as a preset, the preset gained’t be very helpful. Will probably be too particular for a specific picture and would possibly work solely with a tiny proportion of your panorama photographs. Its usefulness will likely be minimal.
The purpose is to create a foundational preset that covers round 80% of any panorama photograph post-processing. And the remaining, 20% or so, would require a customized intervention to make each photograph distinctive.
Let’s get began.
Tips on how to Create Preset in Lightroom Basic
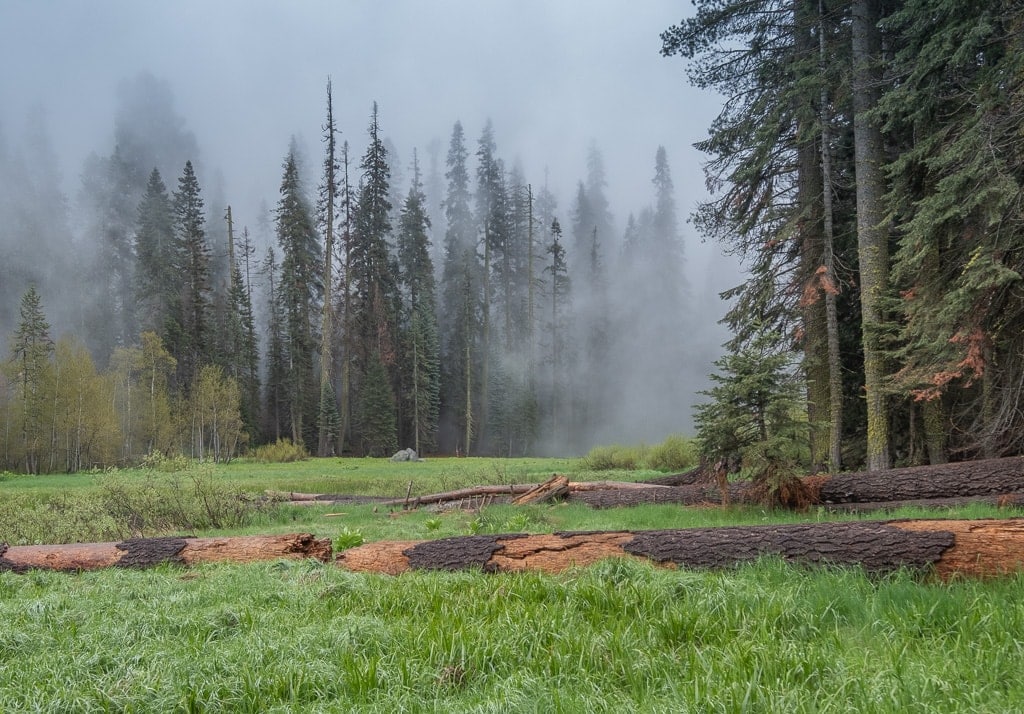
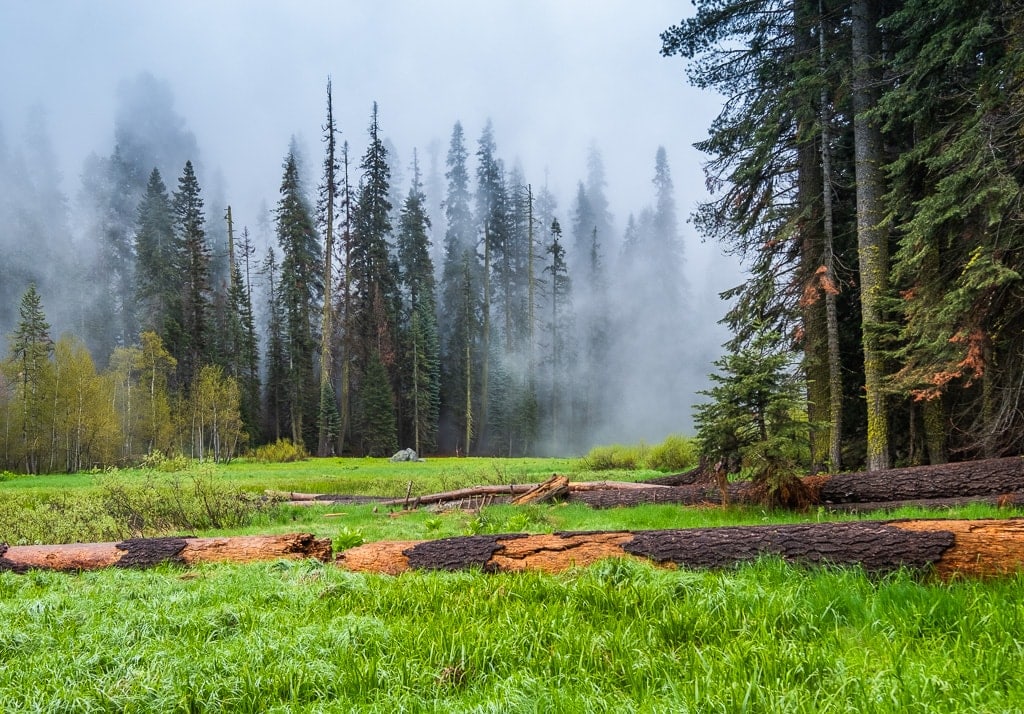
For at this time’s tutorial, I chosen the picture I took in Sequoia Nationwide Park in California. It is a wonderful picture to create a foundational preset as a result of it has many of the parts of a typical panorama {photograph}, corresponding to prolonged dynamic vary, vegetation within the foreground, and atmospheric fog within the background.

Let’s begin making a genetic panorama Lightroom preset.
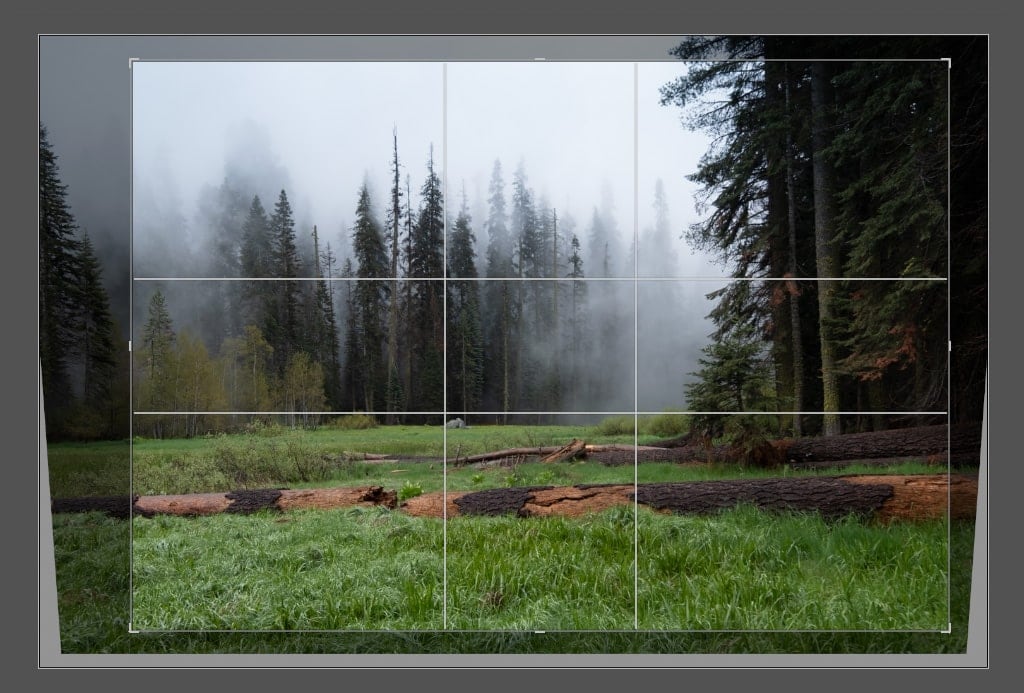
Step 1: Bettering Composition with the Crop Overlay Instrument
Once I begin modifying any panorama photograph, step one is to see if I can enhance the composition by cropping it.
On this case, I can enhance the photograph by making the compositing tighter.
I used the Crop Overlay (R) instrument to crop the picture however preserved the unique facet ratio.

Please observe that cropping adjustment is not going to be part of the preset; I simply wished to observe my common photograph modifying routine.
Step 2: Straightening the Picture with Remodel Instruments
Subsequent step, I needed to guarantee that all horizontal strains of the photograph have been horizontal and all vertical have been completely vertical.
In most panorama photographs, you must make sure that the horizon is straight. And if it’s not, you must repair it.
In my case, I didn’t have an issue with the horizon as a result of the sequoia forest shields it. However I had one other subject which is typical for panorama captures; the vertical strains wanted to be straightened.
Once I took the shot, I tilted the digicam backward, and because of this, the bushes within the photograph converged from the underside to the highest, which didn’t look pure.
I mounted it rapidly by shifting the Vertical slider from the Remodel modifying panel to the left.

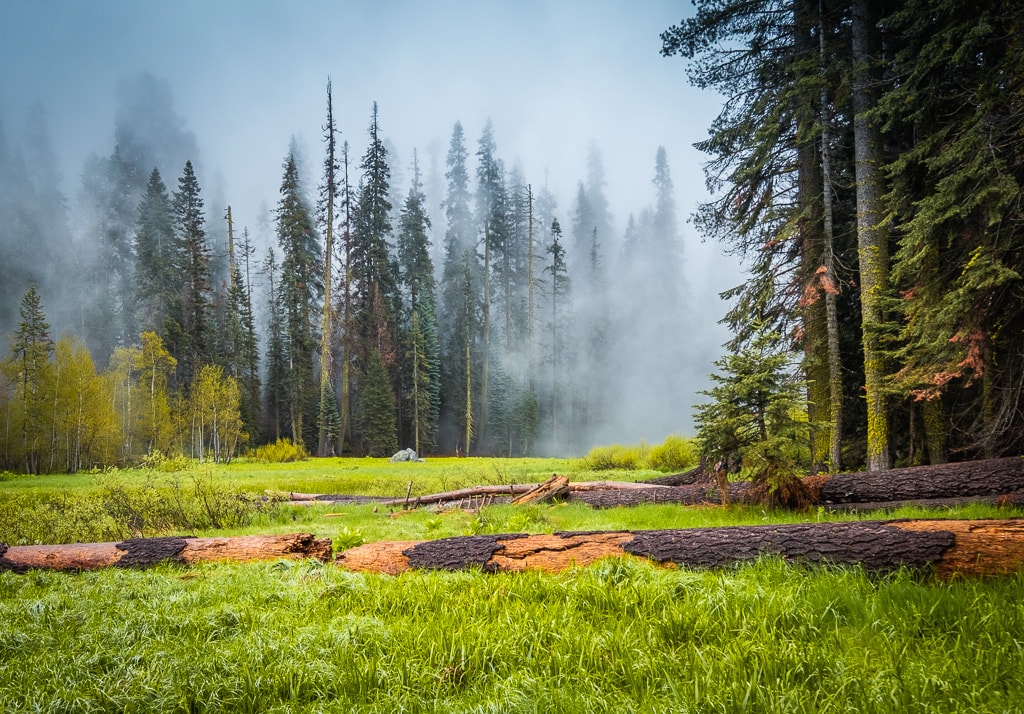
In the long run, I had a picture with improved composition and sound geometry.

I may transfer to the processing.
Step 3: Extending the Dynamic Vary within the Fundamental Panel
After we shoot landscapes, as a rule, we cope with scenes with an prolonged dynamic vary. This picture was not an exception. For me, step one of processing was to maximise the dynamic vary of the unique RAW picture.
I did it by recovering the highlights and lifting the shadows.
I moved the Highlights slider to the left (-100) and the Shadows slider to the fitting (100).
But it surely was not sufficient. I used to be involved that I’d clip the shadows or highlights within the following steps when engaged on distinction.
I prolonged the dynamic vary additional through the use of the White and Black sliders.
Now, when you test the Histogram of the edited picture, you possibly can see the way it differs from the unique one.
Within the unique picture, I hardly had any midtones; the vast majority of picture pixels have been distributed throughout shadows and highlights.
After recovering the highlights and lifting shadows, the Histogram signifies that the majority pixes at the moment are in midtones. It’s a extra balanced photograph, which will likely be simpler to edit.
However you may also discover that the picture seems to be blunt with no distinction and colours. I wanted to steadiness it by growing the distinction and saturation.
I want to keep away from addressing the distinction and saturation within the Fundamental panel as a result of it’s simple to clip the shadows throughout the distinction improve and oversaturate particular colours when utilizing the saturation and vibrancy sliders.
To keep away from future issues, I solely barely elevated the distinction and saturation within the Fundamental panel to compensate for the discount of shadows and highlights.

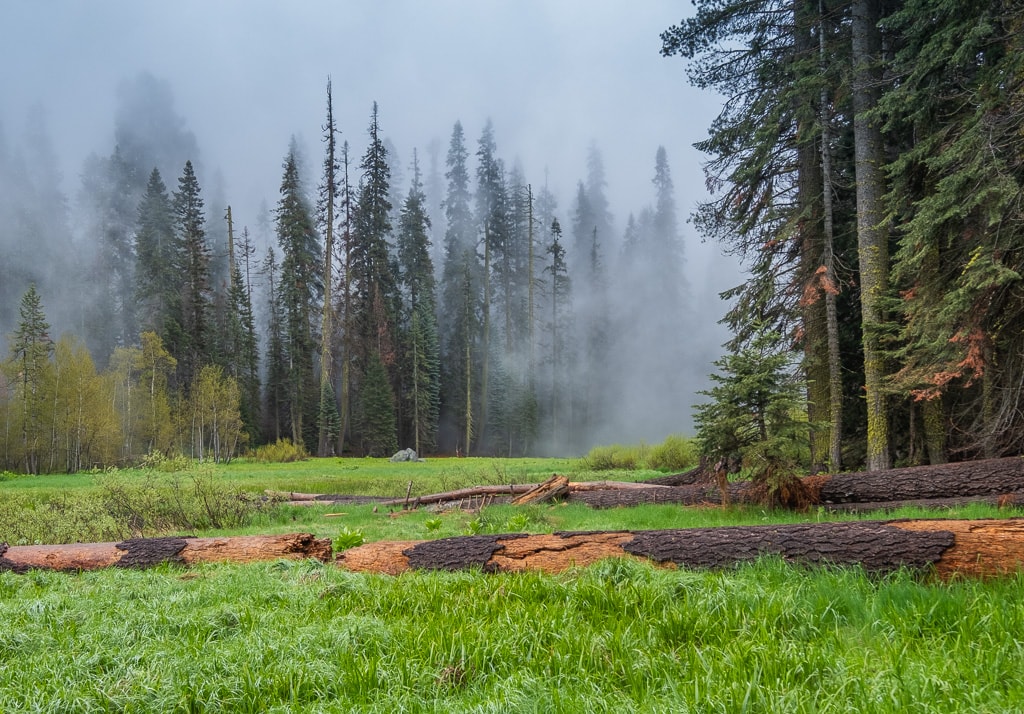
Step 4: Boosting the Distinction within the Tone Curve Panel
The Tone Curve panel is my most popular place to regulate the distinction of the panorama photos. It permits me to guard the highlights and shadows and solely work with the midtones when adjusting the distinction.
Beneath are the values of the adjustment sliders I used for the distinction enhance.
As you possibly can see, I moved the Highlights slider to the left and the Shadows slider to the fitting to guard them from clipping.
And I boosted the distinction by adjusting the Lights and Darks sliders. And I used the totally different values for the Lights and Darks sliders, guaranteeing I elevated the distinction within the brighter space of the picture at a better diploma.

You can not obtain such management over the distinction within the Fundamental panel utilizing the Distinction and Readability sliders.
Step 5: Selective Saturation within the SHL Panel
To create a visually pleasing picture, you should use colours with totally different saturation ranges. And it’s unimaginable to realize it within the Fundamental panel by solely utilizing the Saturation and Vibrance sliders. As an alternative, I used selective saturation within the SHL panel, the place I had full management over the totally different hues of the photograph.
First, I made the changes to the Hues values.
With regard to panorama images, I see two points with how the digital sensor information colours.
First, it shifts blue hues in direction of the purple spectrum. It usually occurs while you shoot an open sky with a wonderfully blue colour; the digital seize could have an unnatural purple tint. I hate it.
Second, I dislike how digital sensors add blue hues to the greens. It makes the vegetation within the panorama photographs unpleasing. And while you attempt to improve the saturation, the vegetation within the digital picture turns into “electrical inexperienced.”
To compensate for the hue points, I moved the Inexperienced slider towards the Yellow spector and the Blue slider towards the inexperienced.
Subsequent, I addressed Saturation.
That is essentially the most essential step when utilizing selective saturation.
I elevated the saturation of Inexperienced and Yellow hues.
On the similar time, I decreased the saturation of the Blue.
The logic right here is that when you’ve got an enormous space of oversaturated sky, it overpowers and ruins all the things.
Lastly, I tweaked Luminosity (Lightness)
Since in most panorama photographs, the realm of the sky is the brightest a part of the seize, I wished to steadiness it with the remainder of the picture by making it darker.

And I’m performed.

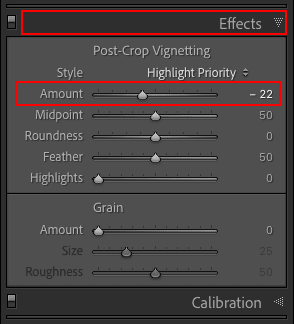
Step 6: Including Vignetting within the Impact Panel
Each panorama photograph wants vignetting. It helps to guide the viewer towards the middle of the picture, away from the sides.
I used the worth of -22, which is an arbitrary quantity as a result of you’ll doubtless have to regulate the extent of vignetting for each picture you edit individually.
That was it. I used to be performed and able to save modifying changes as a preset.
Tips on how to Save Preset in Lightroom
Within the develop module of Adobe Lightroom Basic, find the Presets panel on the left facet of the interface.
Click on the ‘+’ icon and choose the ‘Create Preset…’ possibility from the menu.

And right here is essentially the most essential step of the preset creation.
To create a generic new preset, you should uncheck the parameters that will likely be distinctive for each panorama picture you’ll edit.
It’s essential to uncheck the Publicity as a result of any given picture might be overexposed, underexposed, or spot-on uncovered, and you’ll need to tweak the Publicity for many of the photographs you edit.
The identical goes for the Remodel instruments and Profile Correction.
Now give the preset identify and select the group it belongs to. Optionally, you possibly can create a brand new group or depart ‘Person Presets’ as a default worth.
Lastly, hit the ‘Create’ button, and you’re performed.

Now it’s your flip. Choose your individual panorama photograph and undergo the method of making the Lightroom presets I outlined above. However, when you can’t do it for some purpose, obtain the preset I simply created. After downloading the preset, import it to Lightroom, and you’re able to go.
Listed below are the directions on learn how to import presets to Lightroom. You need to use the preset on each Cellular and Desktop variations of Lightroom.
Tips on how to Use the Presets in Lightroom
Now, let me display my routine for utilizing a generic panorama preset.
Right here is the photograph I took within the native park in Montreal round dawn, and I wished to course of it utilizing the panorama preset I simply created.

After making use of the generic panorama preset, that is the end result I achieved.

I may see 2 points I wanted to deal with.
- The photograph was too darkish.
- The blue space of the sky was oversaturated.
I mounted the problems with 2 easy changes:
- I elevated the Publicity worth (+0.30) within the Fundamental pane.
- I decreased the saturation of the sky with the assistance of the Blue slider (worth: -46) within the HSL panel.

That is the workflow I take advantage of when modifying panorama photographs. It’s not fairly a one-click course of however fairly shut.
Tips on how to Create Preset in Lightroom | Closing Ideas
Studying learn how to create presets in Lightroom is a helpful ability for any photographer. The method could seem intimidating initially, however it would turn into second nature for you very quickly. In the end, creating presets can prevent time whereas modifying your landscapes and guaranteeing that your photographs have the identical constant feel and look.