


Navigating pictures digital camera settings can seem as a posh puzzle for these new to the craft. A elementary understanding of digital camera settings is important to excel within the artwork of pictures. On this information, we’ll unravel the intricacies of those digital camera settings.
Whether or not you employ a Fujifilm, Sony, Canon, or some other digital camera, the common digital camera settings information we offer will function the cornerstone for capturing breathtaking photographs
This information will stroll you thru the important settings: aperture, shutter pace, ISO, and focus modes. Proficiency in these settings will empower you to train inventive management over your images, improve their high quality, and adeptly regulate to numerous lighting situations. So, let’s delve proper in, we could?
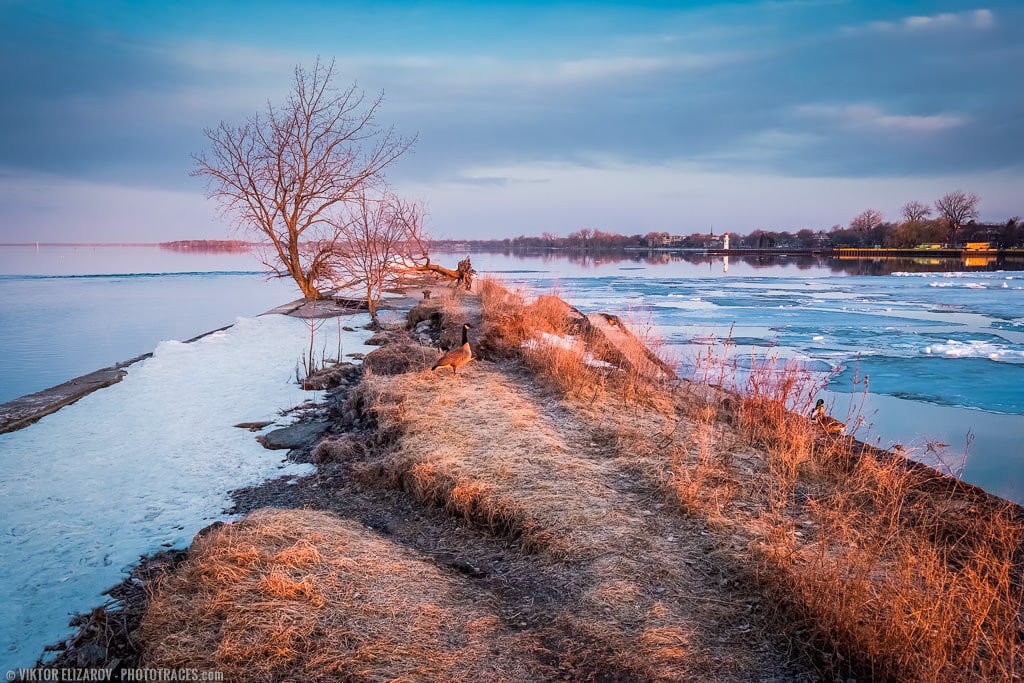
Please word, I’m a journey and panorama photographer, and my suggestions are based mostly on my expertise, primarily specializing in panorama pictures.
Greatest Digicam Settings
- Aperture: f/8-f13 for landscapes, f/18-f/2 for portraits
- Shutter Velocity: total vary accessible in your digital camera relying on the scenario
- ISO: attempt to hold as shut as doable to primary ISO worth (ISO 100)
- Digicam Capturing Mode: Aperture Precedence or Guide Mode
- Metering Mode: Evaluative Metering
- Focus Mode: Single Shot autofocus or Guide Focus for static topics, Steady for shifting topics
- Focus Space: Single Level for static topics, Dynamic for shifting topics
- White Stability: Off
- File Format: RAW
- Drive Mode: Single capturing for static topics and continues for shifting topics
- Publicity Compensation: Modify EV in accordance with histogram
- Coloration House: sRGB
- In-Digicam Noise Discount: Off
- Picture Stabilization: ON when capturing handheld, OFF when utilizing tripod
- Auto ISO: non-compulsory setting when capturing handheld
1. Aperture – The Most Vital Digicam Setting
The aperture of your digital camera is like its eye – a small opening in your lens that allows mild to enter your digital camera. Consider it because the pupil of your digital camera’s eye. The dimensions of your aperture, whether or not large or slim, allows you to regulate the quantity of sunshine that reaches your digital camera’s sensor.
Aperture Settings and Publicity
The aperture performs a major function in publicity, much like how our eyes regulate to vivid daylight or a dim room, the digital camera’s aperture adapts to regulate mild consumption.
A bigger aperture (represented by a smaller f-number, equivalent to f/2) permits extra mild, which brightens your picture.
Conversely, a smaller aperture (indicated by a bigger f-number like f/16) permits much less mild, leading to a darker picture. Discovering the fitting stability between mild and darkness is essential for making a well-exposed {photograph}.
Aperture Settings and Depth of Subject
One of the crucial thrilling facets of aperture is the way it impacts depth of discipline (DoF). Have you ever ever puzzled how skilled photographers obtain that dreamy, blurred background impact in portraits? Or how they seize the whole lot in a panorama shot, from the foreground to the horizon, in sharp focus? The key lies within the aperture setting.
A bigger aperture (or a smaller f-number like f/2) creates a shallow depth of discipline. This implies your topic might be in sharp focus whereas the background will get a phenomenal blur, excellent for portraits.
Conversely, a smaller aperture (a bigger f-number like f/16) offers you a deeper depth of discipline, making each the foreground and background sharp, best for grand panorama pictures.
Mastering Aperture Settings
Adjusting the aperture isn’t rocket science, but it surely does require a little bit of understanding. The aperture is adjusted by altering the f-number or f-stop in your digital camera or lens. The decrease the quantity, the broader the aperture and vice versa.
Aperture Ideas for Totally different Situations
Let me provide you with just a few helpful tips about aperture settings for various eventualities:
- Portraits: To isolate your topic from the background and create a phenomenal bokeh (blurred background), use a bigger aperture. This implies choosing a decrease f-number, like f/2 or f/1.8.
- Landscapes: • To seize the whole lot in sharp element from the foreground to the horizon, go for a smaller aperture. This implies going for the next f-number like f/8 and even f/13.
- Low-light conditions: • When capturing in low mild, a bigger aperture is your finest good friend. It permits extra mild to hit the sensor, serving to you keep away from underexposed photographs. Go for a decrease f-number like f/2 or f/1.8.
The world of aperture can appear a bit sophisticated at first, however when you perceive it, you’ll be amazed on the inventive management it offers you over your photographs. If you’re uncertain in regards to the aperture settings, learn my devoted tutorial on choosing the fitting aperture.
My Aperture Settings
In my pictures, I usually use the f/8 to f/13 aperture vary in about 90% of instances. My favourite lens is the Fujinon 10-24mm f/4 zoom, and I’ve found that its candy spot is at f/8. Because of this at f/8, the lens produces the very best high quality photographs and begins to degrade when utilizing excessive aperture values.
The f/8 setting permits me to realize a big depth of discipline (DoF) whereas sustaining the absolute best picture high quality from the lens.
In some distinctive instances, once I wish to lengthen or maximize the depth of discipline, I go for f/11 or f/13, however I attempt to not exceed these values.
Astrophotography is, in fact, an exception. For this, I exploit the widest aperture, which is f/2.0, as permitted by my devoted astro lens (Rokinon 12mm f/2).

2. Shutter Velocity Settings
Because the saying goes, pictures is all about capturing mild. One of many key elements in controlling how a lot mild enters your digital camera is the shutter pace. Put merely, the shutter pace represents the length for which your digital camera’s shutter stays open, permitting mild to succeed in the digital camera sensor.
The Influence of Shutter Velocity on Publicity
Let’s start with the fundamentals. In pictures, publicity refers back to the complete quantity of sunshine that reaches your digital camera sensor. Consider your digital camera as a window with a curtain. The length you retain this curtain open represents your shutter pace. The longer it stays open, the extra mild enters. Due to this fact, a slower shutter pace permits extra mild in, whereas a sooner shutter pace permits much less mild.
Capturing Movement with Shutter Velocity
Nevertheless, shutter pace doesn’t solely have an effect on publicity; it additionally performs a major function in capturing movement.
With a quick shutter pace (line 1/1000s), you’ll be able to freeze motion, capturing a chook in mid-flight or a droplet of water because it splashes. It’s excellent for high-speed scenes if you don’t wish to miss a second.
On the flip facet, a sluggish shutter pace (like 1/2s) introduces movement blur, including a way of pace and motion to your photographs. Have you ever ever puzzled how these beautiful waterfall photographs with silky-smooth water are captured? You guessed it proper – it’s achieved with a sluggish shutter pace.
My Shutter Velocity Settings
As a panorama photographer, aperture settings are of utmost significance to my pictures as they permit me to regulate the depth of discipline (DoF). Shutter pace can fluctuate extensively relying on the kind of pictures I’m doing.
When capturing commonplace landscapes on a tripod, I set my aperture and let the digital camera decide the suitable shutter pace. Nevertheless, most often, I keep away from going under 1/60s to stop undesirable movement blur brought on by shifting leaves.
When capturing handheld, I usually use the Auto ISO perform (see under), with the shutter pace restricted to a minimal worth of 1/100s.
Throughout lengthy publicity pictures, the shutter pace can vary from 1/20s all the way in which to 1 minute and even longer.

3. Understanding ISO in Pictures
Let’s begin with a typical false impression: ISO isn’t the sensitivity of the sensor to mild. It’s a bit extra advanced than that. The truth is, ISO is an utilized achieve. In layman’s phrases, it amplifies the sign after capturing the picture. Consider it like the amount knob in your stereo. The music (or on this case, the picture) is already there; the ISO simply makes it louder (or brighter).
ISO: Extra Acquire, Much less Ache
The ISO features as a private amplifier in your digital camera. Primarily, it amplifies the sign after the picture has been captured, permitting you to govern the lightness or darkness of your shot. Fairly cool, proper? However right here’s the kicker: your digital camera all the time captures photographs on the base ISO after which adjusts the brightness post-capture. It’s like taking an image in a dim-lit room after which turning on the lights afterward.
The Value of Amplification
Now, this would possibly sound like a magic trick, however like all good issues, it comes with a value. This amplification can influence your picture high quality. The upper the ISO, the extra amplification, and the extra noise (these pesky grainy pixels) your picture can have. Conversely, a decrease ISO will lead to much less amplification and fewer noise, providing you with a cleaner, crisper shot.
ISO Settings for Totally different Situations
Now, onto the enjoyable bit—let’s discuss one of the best ISO settings for varied lighting eventualities.
- In vivid situations, like a sunny seaside or snow-covered mountains, a low ISO (100 or 200) will show you how to cut back noise and protect picture high quality.
- In darker situations, like a candlelit room or an evening sky, a excessive ISO (800 or increased) will show you how to seize extra mild and keep away from these dreaded blurry pictures.
- For combined lighting, equivalent to an indoor-outdoor wedding ceremony, utilizing an auto ISO mode generally is a lifesaver. Your digital camera will robotically regulate the ISO based mostly on the lighting scenario.
- Feeling a bit artsy? Crank your ISO as much as 3200 or increased to create grainy, vintage-looking photographs that may add an entire new layer of depth and emotion to your pictures.
Keep in mind, pictures is an element science, half artwork. So don’t be afraid to experiment along with your ISO settings. In spite of everything, the right shot usually lies within the stability between technical precision and inventive imaginative and prescient.
My ISO Digicam Settings
Panorama pictures is all about dynamic vary. You wish to guarantee that you could seize the total vary of sunshine mirrored from the scene.
Trendy sensors present an unprecedented dynamic vary, however that is primarily achieved on the base ISO setting. Once you improve the ISO values, you start to lose the power to seize the total vary of sunshine, resulting in a discount in dynamic vary.
Because of this, I intention to seize my landscapes utilizing the bottom doable ISO setting, the decrease, the higher. The vast majority of my panorama photographs are taken on the base ISO worth, which is ISO 125 on my Fujifilm X-T5 digital camera.
Nevertheless, since Fujifilm has considerably improved sensor efficiency within the X-T5, I’m not hesitant to make use of increased ISO settings (as much as ISO 800) in difficult lighting situations.

4. Understanding Digicam Capturing Modes
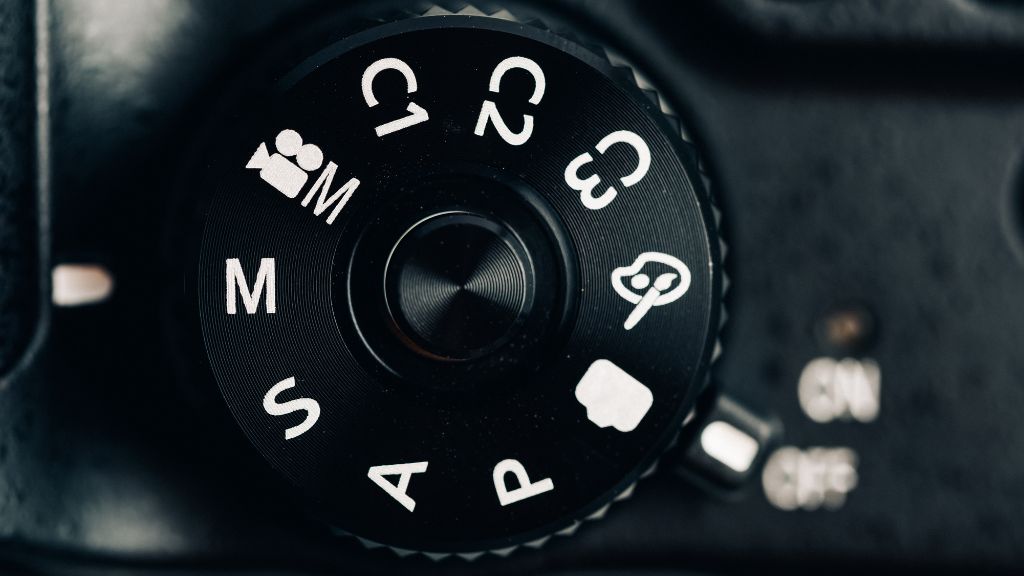
Should you’ve lately acquired a brand new digital camera, you might need seen the multitude of setting choices that may seem a bit overwhelming. These choices are often known as capturing modes, and so they function your digital camera’s management heart. They permit you to handle varied facets of your digital camera settings, together with guide, aperture precedence, shutter precedence, and program mode. Let’s discover every of those, we could?
Guide Mode (M)
Because the title suggests, guide mode places you within the driver’s seat. You management the whole lot – from aperture to shutter pace to ISO. This setting offers probably the most inventive management, but it surely requires a superb understanding of how every setting impacts your photographs.
Execs: Full management over your settings. Excellent for individuals who wish to experiment and study.
Cons: Could be overwhelming for freshmen.
Aperture Precedence Mode (A/Av)
If Guide mode is the management freak, Aperture Precedence is your finest good friend, all the time having your again. You set the aperture, and it robotically adjusts the shutter pace to get the fitting publicity. It’s improbable for controlling depth of discipline – that’s how a lot of your shot is in sharp focus.
This mode is the go-to for many panorama and portrait photographers. Why? As a result of it helps you to concentrate on composition whereas the digital camera types out the publicity.
Shutter Precedence Mode (S/Television)
On this mode, you’re accountable for the shutter pace, and the digital camera takes care of the aperture. It’s wonderful for motion or sports activities pictures the place it’s essential freeze or blur the movement.
Execs: Management over movement seize.
Cons: Much less management over depth of discipline.
Program Mode
Program mode is just like the “auto” mode however on steroids. The digital camera units each aperture and shutter pace, however you’ll be able to tweak them if wanted. It’s a superb start line for freshmen earlier than venturing into the extra guide modes or for these occasions when it’s essential seize a shot shortly, however nonetheless need some management over the settings.
Execs: Full automation with room for changes.
Cons: Might restrict inventive management.
Capturing Modes in Motion
Now that we learn about completely different modes let’s see them in motion. For example, in wildlife pictures, Shutter Precedence mode might be your ally. It ensures that your shutter pace is excessive sufficient to seize sharp photographs of shifting topics.
Alternatively, in road pictures, panorama pictures, and city panorama pictures, Aperture Precedence helps you to management the depth of discipline to isolate your topic from the background.
When capturing macro, Guide mode offers you the precision it’s essential seize these minute particulars.
My Prefered Digicam Mode
In 99% of instances, I exploit the Aperture Precedence digital camera capturing mode. The title clearly means that it prioritizes the aperture setting, which is essential for panorama pictures because it lets you management the depth of discipline (DoF).
Even once I require extra management over the digital camera settings, I don’t swap to Guide Mode. As a substitute, I proceed to make use of Aperture Precedence mode with the Publicity Lock perform, and I exploit Publicity Compensation to fine-tune the Shutter Velocity settings. I consult with this methodology as “Aperture Precedence on steroids.”
5. Understanding Digicam Metering Modes
As a photographer, you’ve in all probability heard of digital camera metering however might not absolutely perceive what it’s or the way it works. In easiest phrases, digital camera metering is the method your digital camera makes use of to measure the brightness of a scene and decide the optimum publicity settings.
Should you’ve ever puzzled why a few of your pictures come out too darkish or too vivid, it’s seemingly on account of your digital camera’s metering mode.
Totally different Kinds of Metering Modes
Most cameras, from revered manufacturers like Fujifilm, Sony, and Canon, provide three essential sorts of metering modes: spot, center-weighted, and evaluative.
1. Spot Metering: This mode measures mild in a really small space of your body (normally lower than 5%), usually the very heart. It’s significantly helpful when you’ve got a particular space you need uncovered accurately, like an individual’s face in a portrait.
2. Heart-Weighted Metering: Because the title implies, this mode offers extra weight to the middle of the body, steadily lowering sensitivity in direction of the perimeters. It’s nice for conventional portraits or when your topic is in the midst of the body.
3. Evaluative Metering: Also called matrix, multi-zone metering, this mode divides the whole body into a number of zones, that are evaluated individually for mild and darkish tones. It’s a “sensible” mode, because the digital camera tries to stability the publicity throughout the body, making it best for advanced scenes or landscapes.
Sensible Examples of Metering in Motion
As an instance these ideas, let’s delve into some sensible examples.
In portrait pictures, you should use spot metering to make sure your topic’s face is well-exposed, no matter whether or not they’re backlit, sidelit, or in shadow. This may add depth and drama to your portraits, drawing consideration to your topic amidst their setting.
In panorama pictures, evaluative metering is usually your finest guess. It skillfully balances the publicity throughout the whole scene, from the brilliant sky to the darker foreground, making certain none of your picture is over or underexposed.
Lastly, for high-key pictures (photographs which are predominantly vivid and have minimal shadows), spot metering can be utilized to regulate publicity and stop overexposing your topic.
My Publicity Metering Method
Over time, my method has advanced relating to how I obtain the right publicity. Now, I persistently use the Evaluative Metering mode (Multi on Fujifilm cameras) for each panorama I shoot.
I level the digital camera towards the scene I intend to seize and make use of the AFL button to lock the publicity. Subsequent, I activate the Histogram inside my EVF. Lastly, I exploit the Publicity Compensation perform to make the publicity as vivid as doable with out clipping the highlights, utilizing the Histogram as a information to make the mandatory changes.
This system permits me to realize the right publicity with each shot I take.
Often, I exploit the Spot Metering mode to pattern the publicity from an individual’s face when capturing portraits.
6. Understanding Focus Modes
Let’s dive proper in and demystify a vital facet of pictures—focus mode. As a photographer, whether or not you’re utilizing Fujifilm, Sony, or Canon, your digital camera’s focus mode is like your trusty sidekick. It’s the way in which your digital camera zeroes in on the topic in your body, and boy, does it have a major influence on the sharpness of your photographs!
There are 3 focus modes:
Single Shot Autofocus (AF-S)
Performance: In AF-S mode, the digital camera focuses on the topic as soon as and locks the main target when the shutter button is pressed midway otherwise you press the devoted focus button. This mode is right for stationary topics or conditions the place you need exact management over what the digital camera is concentrated on.
Utilization: AF-S is usually used for nonetheless pictures, equivalent to outside portraits, landscapes, and macro pictures, the place the topic isn’t shifting a lot, and also you wish to guarantee a pointy, well-focused picture.
Steady Autofocus (AF-C)
Performance: AF-C, also called AI Servo (Canon), is designed for monitoring shifting topics. On this mode, the digital camera repeatedly adjusts the main target so long as the shutter button is held midway or the digital camera is in steady capturing mode. It’s particularly helpful for capturing topics which are in movement, like sports activities, wildlife, or fast-moving objects.
Utilization: AF-C is important when it’s essential keep a shifting topic in focus all through a sequence of pictures. It’s well-suited for motion pictures.
Guide Focus (M)
Performance: In guide focus mode, the digital camera doesn’t robotically regulate the main target. As a substitute, the photographer manually turns the main target ring on the lens to realize the specified focus level. This mode offers the utmost management over the main target and is commonly used when the digital camera’s autofocus would possibly wrestle to seek out the right focus, or if you wish to create particular inventive results.
Utilization: Guide focus is usually utilized in conditions the place autofocus could also be unreliable, equivalent to in low-light situations or with topics missing distinction. It’s additionally favored by some photographers for macro, astrophotography, and panorama pictures, the place exact focus management is important.
My Focus Digicam Settings
I completely use the Single Shot Autofocus mode. I perceive that many panorama photographers usually desire to make use of Guide Mode, however I personally discover it pointless.
For me, the mix of the Single Shot Autofocus mode together with the AFL (autofocus lock) perform offers each the comfort of Autofocus and the pliability of Guide Focus.
7. Focus Space Setting
Focus space modes, also called autofocus space modes, are settings on a digital camera that decide how the digital camera’s autofocus system selects and makes use of focus factors inside the body. These modes mean you can management the place the digital camera ought to focus when capturing a picture.
The particular names and choices for focus space modes might fluctuate between digital camera manufacturers and fashions, however listed here are some widespread focus space modes you might encounter:
Automated Space AF Mode
Performance: In Automated Space AF Mode, the digital camera’s autofocus system takes management and robotically selects the main target level(s) based mostly on the topic it identifies as the first focus level. The digital camera makes use of algorithms to investigate the scene and decide the place to focus.
Utilization: This mode is handy for fast and simple capturing if you need the digital camera to deal with focus level choice. It’s appropriate for conditions the place the topic is comparatively central and well-defined, making it a wonderful alternative for informal pictures and point-and-shoot eventualities.
Single-Level Space AF Mode
Performance: Single-Level Space AF Mode permits the consumer to manually choose a single focus level inside the body. The digital camera will concentrate on the topic on the chosen focus level, offering exact management over the main target space.
Utilization: This mode is right for conditions the place you wish to specify the precise level of focus. Photographers generally use this mode for portraits, macro pictures, or when the topic is off-center and distinct from the background, making certain that the digital camera focuses precisely the place they need it to.
Dynamic Space AF Mode
Performance: Dynamic Space AF Mode is designed for monitoring shifting topics. On this mode, you’ll be able to choose a single focus level, however the digital camera can even use the encompassing factors to help in monitoring the topic because it strikes inside the body.
Utilization: Dynamic Space AF Mode is particularly helpful for capturing topics in movement, equivalent to sports activities, wildlife, or fast-paced occasions. It lets you keep a shifting topic in focus whereas nonetheless providing some management over the preliminary focus level choice.
My Focus Space Setting
My main goal on the subject of focusing is to make sure I concentrate on the fitting space of the scene to realize the widest doable depth of discipline (DoF). In easier phrases, I intention to have the whole lot in focus from the foreground to the distant background. To achieve this objective, I make use of the Hyperfocal Distance method.
I exploit the Single Level Space AF Mode to focus exactly on the world of the scene that corresponds to the Hyperfocal Distance. As soon as I’ve centered on the right spot, I lock the main target utilizing the AFL button. At this stage, I can think about composing the shot with out caring about focusing.

8. White Stability Setting
What’s white stability? In layman’s phrases, it’s the shade temperature of your mild supply. Certain, it would sound technical, however consider it because the ‘temper lighting’ in your picture. It’s this stability that determines how heat or cool your colours will seem, impacting the whole lot from the tender blush of a sundown to the crisp blue of a transparent sky.
The function of white stability in shade accuracy can’t be overstated. Think about snapping a phenomenal seaside scene on a sunny day, however your closing picture seems extra like a cold winter’s morning. That’s the pesky work of a improper white stability. If it ideas in direction of the ‘heat’ facet, your picture takes on an orange tint. Swing too ‘cool’, and also you’re left with a blue wash over your picture.
Adjusting White Stability: Presets and Guide Settings
Fortunately, adjusting your white stability is a breeze, even if you happen to’re sporting entry-level cameras from Fujifilm, Sony, Canon or different digital camera manufacturers. Most fashions come geared up with preset modes to match your lighting supply. You’ve in all probability seen these choices earlier than: sunny, cloudy, tungsten, and so forth. Choosing the preset that matches your situations is a fast and simple option to get your white stability on observe.
However for individuals who like to take the reins, there’s the choice of manually setting the Kelvin worth in your digital camera. This offers you full management over the white stability, letting you fine-tune it to your precise liking.
The Energy of RAW Put up-Processing
A fast tip for these of you capturing in RAW format: don’t stress an excessive amount of about getting the right white stability in-camera. Once you shoot RAW, you’ll be able to tweak the white stability throughout post-processing in Lightroom with out compromising picture high quality. It’s a helpful trick that may prevent from lots of on-location fiddling!
My White Stability Digicam Settings
Since I completely shoot in RAW file format, I usually disregard White Stability settings.
My White Stability is persistently set to the default worth, AUTO, which normally performs fairly effectively by itself. I can all the time make White Stability changes in Lightroom throughout post-processing if mandatory.

9. File Format Settings
When utilizing a digital digital camera, you usually have the choice to pick the file format wherein your photographs are saved. The 2 most typical file codecs are JPEG and RAW.
JPEG: The Versatile Alternative
JPEG, or Joint Photographic Consultants Group (sure, it’s a mouthful), is the commonest format utilized by digital cameras and different picture capturing gadgets. This format is famend for its potential to compress information with out dropping a major quantity of element. It’s like your favourite suitcase – it may possibly pack lots of stuff (on this case, visible data) right into a tidy, compact area.
The benefits of JPEG lie in its compatibility and dimension. JPEG information might be seen, edited, and shared on almost any system. This makes it a wonderful alternative for fast sharing on social media or through e-mail. Plus, the smaller file dimension means you’ll be able to retailer extra photographs in your reminiscence card.
Nevertheless, it’s vital to notice that JPEG information are ‘lossy.’ Because of this every time you open and save the file, some information is misplaced, which may result in a lower in picture high quality over time.
RAW: The Detailed Grasp
Alternatively, RAW is a file format that captures all picture information recorded by the sensor if you take a photograph. When capturing in RAW, you’re getting the unprocessed, untouched, “uncooked” particulars straight out of your digital camera’s sensor.
RAW information provide the next high quality of picture in comparison with JPEG. They include extra element and permit for higher flexibility in post-processing. With RAW information, you’ll be able to regulate issues like publicity, white stability, and shade saturation with out degrading the standard of the picture.
The draw back? RAW information are a lot bigger than JPEGs, which suggests they take up extra cupboard space. Moreover, RAW information must be processed utilizing software program like Adobe Lightroom earlier than they are often shared or printed.
My File Format Digicam Settings
At present, I completely shoot in RAW format. I do not forget that after switching to Fujifilm, there was a interval once I used the RAW+JPEG mixture to profit from Fujifilm’s well-liked Simulations (which solely apply to JPEGs). Nevertheless, capturing in RAW+JPEG doubles the variety of digital information it’s essential handle, and shortly after, I deserted this method.
Moreover, I found that I may replicate the Fujifilm Simulation seems in Lightroom in the course of the post-processing stage.

10. Drive Modes in Digicam Settings
Drive modes, merely put, dictate how your digital camera behaves if you press the shutter button.
Single Shot Drive Mode
In Single Shot mode, your digital camera takes one {photograph} every time you press the shutter button. It’s the default mode on most cameras, together with well-liked manufacturers like Fujifilm, Sony, and Canon. This mode is best when your topic is stationary, and you’ve got loads of time to compose the shot.
Think about you’re photographing a serene panorama. The mountains aren’t shifting, the timber aren’t dashing about – the whole lot remains to be. On this state of affairs, Single Shot mode is your finest good friend. It lets you take your time, regulate focus, publicity and composition, and seize the scene.
Steady (Burst) Drive Mode
Also called Burst Mode, the Steady Mode, because the title suggests, takes a number of pictures in fast succession so long as you maintain down the shutter button. This mode is a game-changer if you’re capturing topics in movement.
Take into consideration a bustling market or a chook chickening out; these scenes are filled with motion and motion. Right here, Steady Mode involves your rescue. By firing off a collection of pictures, you improve your probabilities of nabbing that excellent image the place the whole lot aligns good.
Shutter Delay or Self-Timer Drive Mode
The Shutter Delay Drive Mode is a setting that introduces a quick delay between the time you press the shutter button and when the digital camera really takes the image. This delay lets you take away your hand from the digital camera, lowering the probabilities of digital camera shake, which may result in blurry photographs.
The delay can usually be set to numerous durations, equivalent to 2 seconds or 10 seconds, relying in your digital camera mannequin.
The shutter delay mode is extensively utilized by panorama photographers when utilizing a tripod.
In a nutshell, publicity compensation lets you regulate publicity when the digital camera metering system can’t consider correctly the brightness of the scene.
My Drive Mode Digicam Settings
For my journey and panorama pictures, I completely use the Single Shot Drive Mode.
Prior to now, I used Burst Mode, particularly Publicity Bracketing. Relying in your most well-liked settings, the digital camera takes a number of pictures (3, 5, 7) with completely different publicity values, enabling you to merge these pictures right into a single HDR picture throughout post-processing. Nevertheless, on account of developments in digital camera sensor know-how, trendy cameras have an in depth dynamic vary, permitting you to seize any scene in a single shot. Thus, my want for Publicity Bracketing in the present day is minimal.
However, when capturing from a tripod, I often make use of the Self-Timer Mode. To cut back digital camera shake throughout lengthy exposures, a self-timer is indispensable.
11. Publicity Compensation
Publicity compensation lets you regulate the general brightness or darkness of a picture. It’s like turning the brightness knob in your TV, however in your images.
At its core, publicity compensation modifications the quantity of sunshine that reaches the sensor of your digital camera. Whether or not you’re utilizing a Fujifilm, Sony, Nikon or Canon, this characteristic is a device you should use to make your images extra visually pleasing. It’s all about permitting the correct quantity of sunshine to hit your digital camera’s sensor, making certain your picture isn’t too washed out or too darkish.
Publicity Compensation Values and Their Results
Consider publicity compensation values as a scale. On this scale, -2 EV (EV stands for Publicity Worth) will make your picture darker, 0 EV is the center floor, or “regular,” and +2 EV will make your picture brighter.
Choosing the proper publicity compensation can actually rely upon the scenario. For backlit topics or snowy scenes that mirror lots of mild, you would possibly wish to add publicity compensation (+EV). Should you’re capturing in darker scenes, you would possibly wish to cut back publicity compensation (-EV).
In a nutshell, publicity compensation lets you regulate publicity when the digital camera metering system can’t consider correctly the brightness of the scene.
My Publicity Compensation Method
I consider that Publicity Compensation is without doubt one of the most underappreciated digital camera settings, and lots of photographers might not absolutely grasp its actual worth.
I exploit Publicity Compensation in each shot I take. To me, Publicity Compensation, together with Auto Publicity Lock (AEL button), transforms Aperture Precedence Mode into an accuracy stage akin to Guide Publicity whereas remaining extra versatile and faster.
In Aperture Precedence mode, I level my digital camera on the scene I intend to seize and easily lock the publicity by urgent the AEL button. Following that, I activate the Histogram inside the Digital Viewfinder (EVF) utilizing a programmable button on the digital camera. Lastly, I exploit Publicity Compensation to fine-tune the publicity, aiming for the brightest end result doable with out clipping the highlights. I depend on the Histogram to find out the fitting Publicity Compensation worth.
With this system, I discover Guide Publicity pointless, but it permits me to realize the fitting publicity with each shot I take.

12. Coloration House Setting
In terms of digital pictures, the idea of shade area performs a major function in figuring out how your photographs are represented and displayed on varied gadgets and platforms. Two widespread shade areas you’ll encounter are sRGB and AdobeRGB.
Coloration area settings play a vital half in how your photographs end up. Nevertheless, do not forget that these settings influence solely JPEGs. For many who shoot RAW, conserving the colour area off and adjusting it in Lightroom in the course of the export course of is the one technique.
For many on a regular basis and web-based pictures when capturing JPEG, sRGB is ample.
My Coloration House Digicam Settings
Since I completely shoot in RAW, I don’t take note of the digital camera’s Coloration House settings. I regulate the Coloration House once I’m able to export the developed RAW file as a JPEG picture.
Nevertheless, on these uncommon events once I take photographs in JPEG format, I set the Coloration House to sRGB.
13. In-Digicam Noise Discount Settings
Most trendy digital camera fashions, come geared up with in-camera noise discount settings. These settings can considerably lower the quantity of noise in your photographs, particularly in these shot in low-light situations or with longer exposures.
Lengthy Publicity Noise Discount Performance
What’s lengthy publicity noise discount (LENR), and the way does it work?
LENR subtracts the noise out of your picture by taking a second, noise-only shot. For instance, in case you have a 30-second publicity, your digital camera will take a further 30-second shot with the shutter closed to establish the noise, after which subtract it out of your authentic picture.
This course of successfully doubles your digital camera’s seize time, that means a 30-second publicity really takes a minute to seize. This may be inconvenient, significantly when capturing a collection of lengthy publicity pictures.
To Use or To not Use In-Digicam Noise Discount?
So, with these functionalities in thoughts, must you use your digital camera’s built-in noise discount settings? In my 15 years of expertise in journey and panorama pictures, I’ve discovered that it’s normally finest to hold these settings OFF.
Why? The principle cause is management. Noise discount isn’t a one-size-fits-all resolution. The quantity of noise discount wanted varies relying on the lighting situations, the topic, and your private aesthetic preferences. By turning off in-camera noise discount, you keep the pliability to use noise discount in post-processing.
My In-Digicam Noise Discount Settings
I don’t use in-camera noise discount features. I discover it extra handy and efficient to use noise discount throughout post-processing. Trendy noise discount software program like Topaz DeNoise and Lightroom’s denoise characteristic yield considerably higher outcomes than counting on in-camera noise discount.
14. In-Physique Picture Stabilization
Within the easiest of phrases, in-body picture stabilization (IBIS) is a know-how that enables your digital camera to counteract any unintended movement. This may embody something from the slight trembling of your hand to the vibrations from a shifting automobile. Cameras with IBIS, equivalent to these produced by most manufacturers, can give you sharper photographs, even in situations the place you’d usually wrestle with digital camera shake.
When to Use Picture Stabilization
Once you’re capturing handheld, your digital camera is extra vulnerable to the small actions of your physique. That’s when the magic of picture stabilization comes into play. It helps counterbalance these miniature shakes that may blur your pictures, significantly in low-light conditions the place it’s essential use slower shutter speeds.
Turning Off Picture Stabilization
Nevertheless, in case your digital camera is mounted on a tripod, there’s no use for picture stabilization. The truth is, leaving it on may even counteract the steadiness of the tripod, resulting in minor picture blurring. To place it merely, when your digital camera is completely regular, the picture stabilization would possibly attempt to right non-existent actions, which may inadvertently result in blurry pictures.
My In-body Picture Stabilization Settings
My expertise with In-Physique Picture Stabilization is comparatively quick. The Fujifilm X-T5 is the primary digital camera I personal that has this performance. Earlier than the X-T5, I relied on stabilized lenses from Sony and Fujifilm.
In most pictures tutorial guides, you’ll discover the identical suggestions, suggesting that you just use in-body picture stabilization solely when capturing handheld. Nevertheless, if you shoot with a tripod, it’s suggested to show it off to stop pointless motion brought on by the stabilizer itself.
To be sincere, I haven’t seen any adverse results of in-body stabilization when capturing with a tripod on my Fujifilm X-T5. Due to this fact, I hold in-body stabilization ON always. However, I can’t converse for each digital camera model and mannequin.

15. Auto ISO Settings (Elective)
When capturing handheld, controlling your shutter pace is important. A sluggish shutter pace may end up in digital camera shake and blurry photographs, one thing no photographer needs! Through the use of Auto ISO, you can set a minimal shutter pace, and your digital camera will robotically improve the ISO to compensate as mild decreases. This ensures you by no means fall under your required shutter pace, conserving your photographs sharp and clear.
As photographers, we love having management over our photographs. However there’s additionally one thing to be mentioned for comfort. Auto ISO provides a stability, offering the management we crave with the added comfort of automation. It’s like having a co-pilot, able to step in if you want it most.
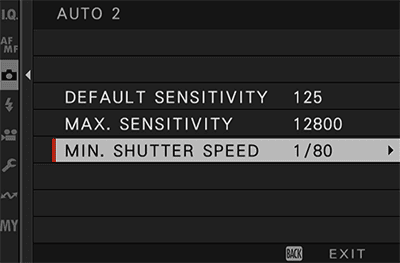
My Auto ISO Digicam Settings
I bear in mind when Fujifilm launched the Auto ISO performance within the X-T2 mannequin by means of a firmware replace. That marked the start of my deliberate efforts to scale back my reliance on a tripod and improve my use of handheld capturing for higher flexibility.
Auto ISO shortly grew to become considered one of my favourite options when capturing handheld. I exploit the next settings:
Digicam Settings in Pictures | Closing Ideas
In conclusion, understanding and mastering your digital camera settings is a elementary step in direction of elevating your pictures expertise. Via exploring settings equivalent to aperture, shutter pace, ISO, white stability, focus modes, metering modes, and extra, you achieve inventive management over your photographs and the power to adapt to numerous lighting situations.
Keep in mind, the journey to changing into a proficient photographer entails a mix of technical data and inventive experimentation. So, don’t be afraid to experiment with these settings and uncover your distinctive pictures model.